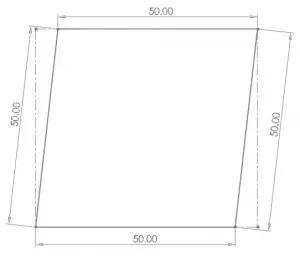
Do you want to check how square a block is but are not sure what squareness exactly is? Maybe, you also want to know how to express the degree of squareness in number. Aside from that, you are wondering whether there is something exist a perfect square. We will be discussing about them all here.
However, before you go further, make sure you know about parallelism, flatness, straightness, and 90-degree corner. Understanding these geometrical terms help you understand squareness well.
Why Learn Squareness
Squareness and other shape descriptor parameters such as circularity, rectangularity, perpendicularity, triangularity, symmetry, etc are essential to know in mechanical design and production measurement. These characteristics help identify the correctness of any product or object’s surface.
Any machine component that must be square to operate the machine will reduce the machine or system’s performance if it loses its squareness due to wear and tear.
What Does Squareness Mean?
Generally, squareness can be understood as a geometrical characteristic of any line, plane, or object that tells how much it is shaped like a square.

Squareness is an essential measuring property in engineering metrology. Its value is the minimum distance between two parallel planes that are normal to the reference axis and completely surround that same reference plane.
For example, suppose a company manufactures a square product based on a CAD design. In that case, measuring the squareness of that manufactured product with standardizing the CAD model reveals how much square the final product is or how far it deviates from the required squareness.
In the other words,,,
Squareness is how square an item is with each side meeting to form a 90-degree angle to the next.
If they are under a measurement and are set not very close, the object somehow runs out of alignment, therefore it will not be very square.
Using only your eyes, angles can seem like they are 90 degrees. But in fact, it could be 88 – 85 degrees on one corner and 92 – 95 degrees on the other, giving the appearance of being not really a square.
Another case when a tiny deviation occurs, in which invisible for eyes to detect, measuring squareness is not only beneficial for quality checking but also quantity measurement.
It doesn’t stop just there; measuring one corner against the other is a starting point. You must check the flatness and parallelism as well.
Why Is It Called A Perfect Square? How to Determine A Perfect Square?
Actually, we don’t know if there is something that is perfectly square.
However, we know that an engineer square or master block square (Mitutoyo 311-111) is almost a perfect square.
It’s called a perfect square when it doesn’t have deviation.
An engineer square or machinist square is a square standard whose primary function is to check the geometrical deviation of squareness and wear and tear of any machine or product surface over time.
Unfortunately, it is only for checking; not measuring. So, it can be categorized as a gauge.
It’s constructed of stainless or hard steel and has two parts: a blade and a stock that meets British Standard BS939.
Engineer’s try squares are available in a variety of sizes. Some of the most popular and adaptable sizes are 50, 75, 100, 150, 200, 300, 450, 600, 800, and 1000 (in mm).
In addition, to use engineer square to assess the squareness, other techniques are also available such as laser alignment, focused telescope, and dial indicator.
What is Squareness Error? How to Express It in Numeric?
Squareness error is the deviation of any surface from Squareness. As previously said, the square surface touches all portions of the engineer’s try square, in case of error, a gap between the surface and the try square blade is seen while the try square is holding on the corner.
The square error can also be measured by attaching the feeler gauge in the Engineer’s try square that measures the gap between the surface and its thicker section to show the squareness error.
The numerical value of squareness is the minimum distance between two parallel planes that are normal to the axis of reference and completely encompass that same reference plane.
What is Squareness Tolerance?
When it comes to expressing squareness, we use squareness tolerance.
Squareness tolerance refers to the maximum allowable distance between the parallel planes that are normal to the reference axis and completely enclose that same reference plane.
What is DIN 875?
DIN 875 is the standardization of the squareness for any machined surface. To get this standardization, it should have specified accuracy on all corners of the surface. Therefore, the DIN 875 has four accuracy classes (00, 0, 1, & 2) for lengths varying from 50 mm to 1500 mm based on deviation from the right-angle at the corner while surface touching all sections of a try square.
On two distinct levels of accuracy, two different formulas are employed to calculate the deviation length, A (II°) and B (I°) grades.
- Grade A (II°) = 0.02 + L/10.000 mm
- Grade B (I°) = 0.01 + L/20.000 mm
As you can see, Grade B is more precise (+0.01) than Grade A.

