
There are some points that we can identify in the case of the differences between dial indicator and test indicator.
The identification of these two indicator models can lead us to deeply understand whether to use the dial indicator or the test indicator when facing a certain measuring challenge.
If you are new and on your way to buying a new dial indicator or test indicator, this topic may be very interesting for you. There are some points we have successfully put together through the following table.
| Comparison Points | Dial Indicator | Test Indicator |
|---|---|---|
| 1. Spindle | Plunger | Lever |
| 2. Contact Point Movement | Moving out & in | Swinging |
| 3. Contact Point Position on Surface | Vertical | Horizontal |
| 4. Range (Typically) | 0 - 1" | 0 - 0.03" |
| 5. Resolution (Typically) | 0.001" | 0.0005" |
| 6. Measurement Type | Comparative | Consistentcy |
| 7. Size | Larger Dimension | Smaller Dimension |
| 8. Weight | Weighter | Lighter |
| 9. Visibility | Larger Dial Diameter | Smaller Dial Diameter |
| 10. Amount of Scale | Two | Mostly a single scale |
| 11. Way to Mount | Lug Back | Stem |
| 12. Body Position to Surface | Less Flexible | More Flexible |
Dial Indicator Vs Test Indicator: the 9 Differences
1. Where the Contact Point Joins On
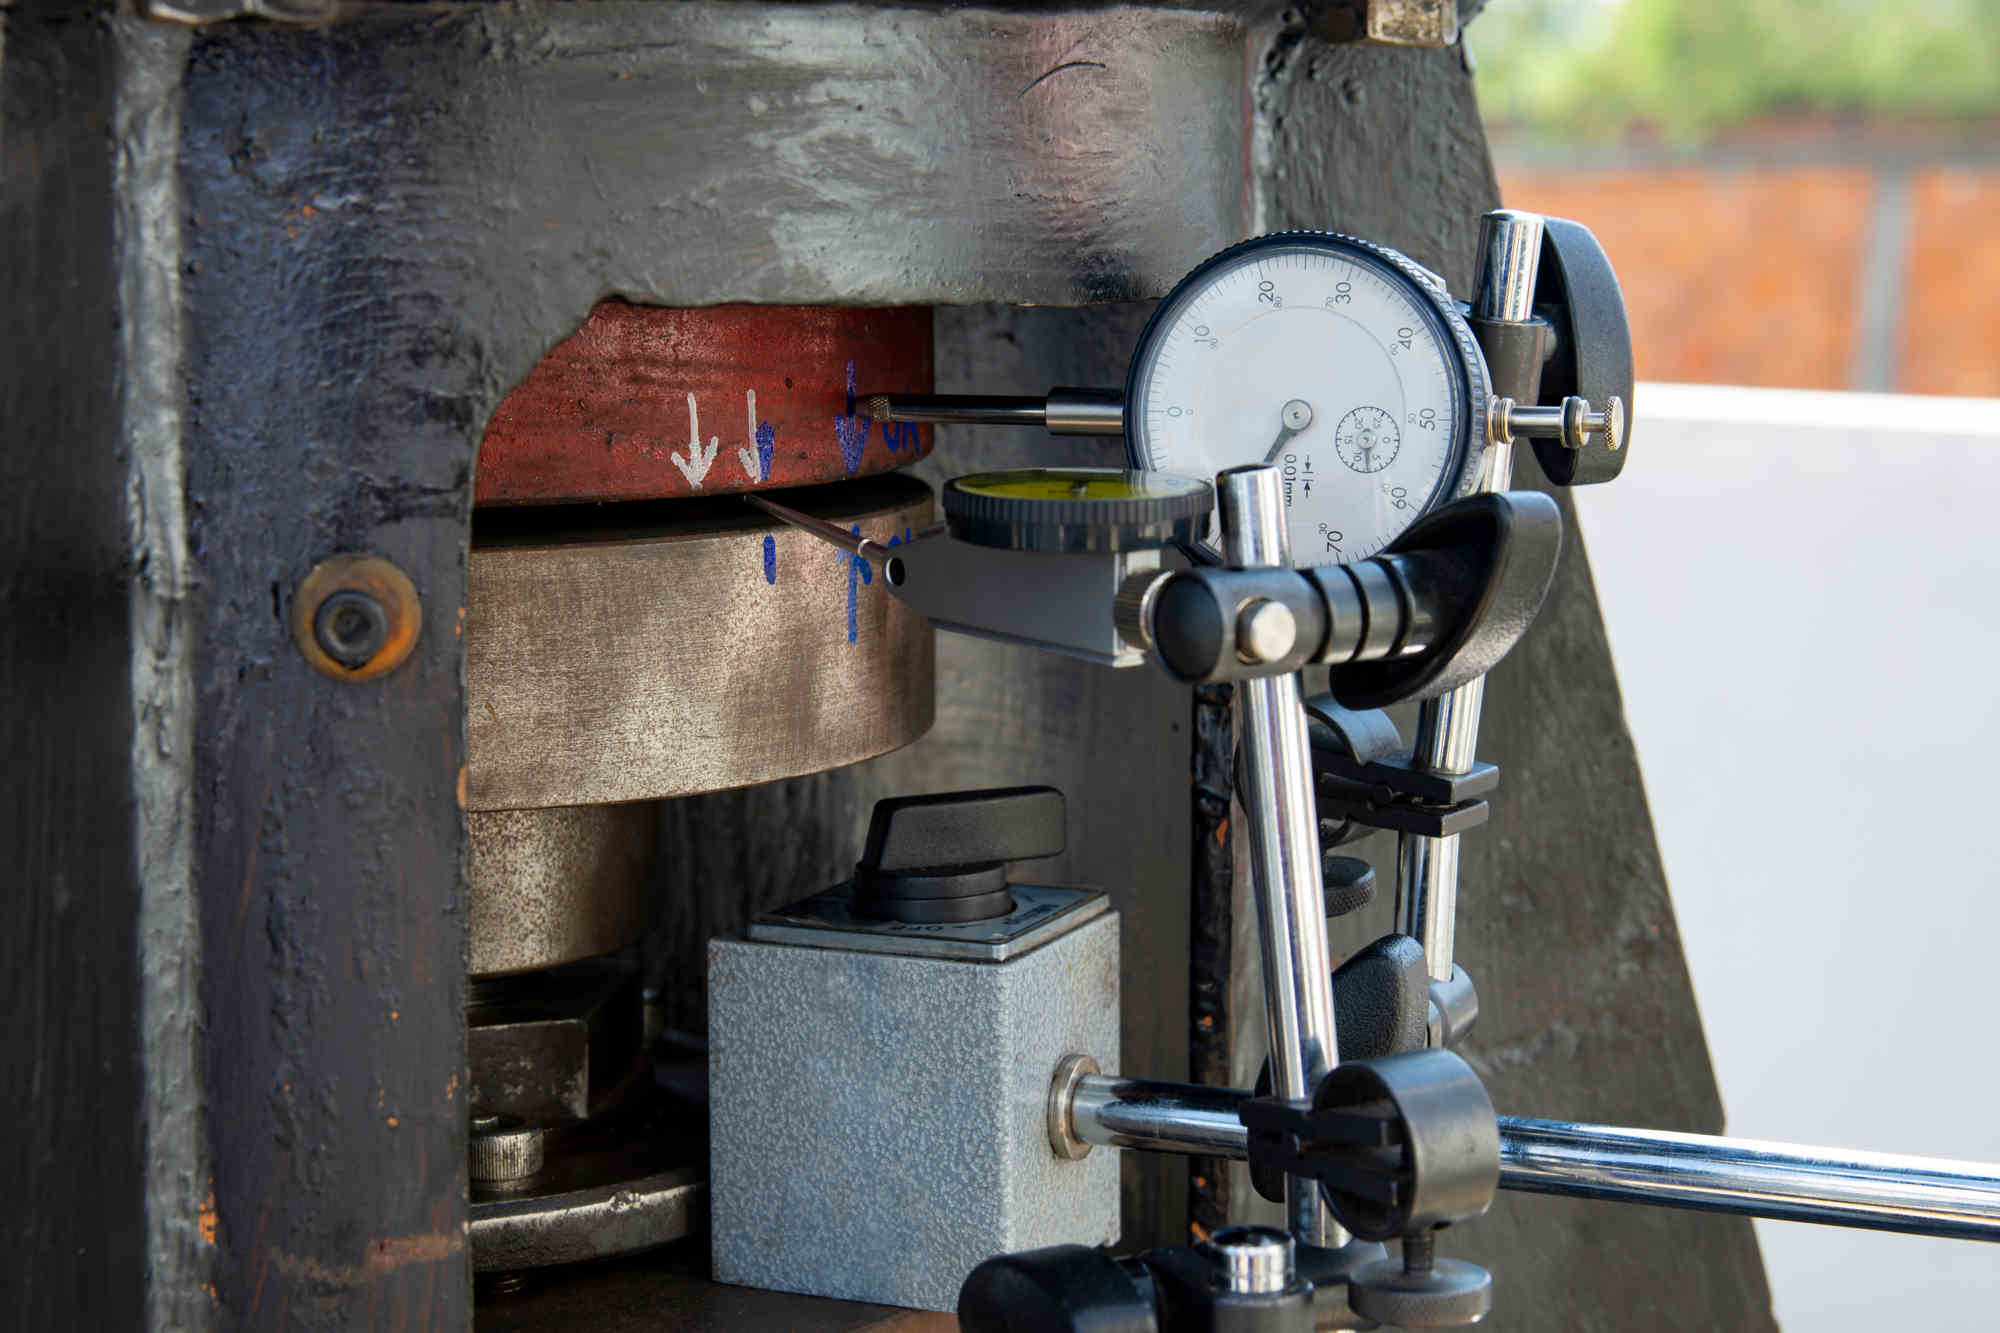
How and where the contact point of both these indicators sticks on is the most contrasting part to identify of dial indicator vs test indicator.
The dial indicator has a plunger where the contact point is screwed on it. This part connects the contact tip and the stem. People say it with the spindle as well.
On the other hand, the test indicator has a part called a lever where the contact point and the lever are one body. This part connects the contact point to its pivot. Some people may say an arm or probe instead of a lever.
2. Contact Point Movement
The dial indicator has a contact tip that moves out and in from and to the stem. In the initial position, the plunger will move out from the stem. When you apply pressure to the contact point, the contact point and plunger move in. And when there is no pressure, the contact tip will return to its initial position.
While the test indicator swings around in a certain angle span. It swings around the test indicator part called a pivot. When you apply pressure to the contact point, the angular movement will occur to the lever.
3. Contact Point Position to the Surface to be Measured
It’s required to be in a vertical position for a dial indicator to excel in its measurement. It means when mounted on a stand, the dial indicator must be straight and vertical with the horizontal surface (perpendicular). In other words, it shapes a 90° position to the surface. This angle must be acquired in order to avoid cosine error.
Compared to the test indicator, you could position the lever horizontally to the surface. In other words, the position shapes a 0° angle to the surface. Cosine error can happen if you don’t apply this angle However, some test indicators come in a different way. You need to apply a 12° angle such as what happens to the Interapid test indicator.
Further, the contact position lets the dial indicator becomes able to measure depth, while the test indicator doesn’t.
4. Body Position to the Surface (Flexibility)
You have to position the dial indicator plunger exactly 90° to the surface (perpendicular). Here is the drawback of a dial indicator when you have to measure the inner diameter of a narrow bore. The plunger can’t get into the deeper area to measure properly. The body (dial scale) will be blocked.
Things get different when it comes to the test indicator. Since the lever swings around the pivot, you can adjust by bending the body or not and let the lever keep 0° to the surface. Then, the lever can get into the deeper area.
A special mention for Interapid test indicator in which you need to apply a 12° angle position between the lever and surface. In some cases, this position benefits you to reach a farther spot into the deeper area of the bore.
5. Measurement Range
Dial indicators have a longer measurement range, typically 0-1″. You can easily count the pointer revolution on the inner scale. Let’s give you an example. If the dial indicator has a 1″ range, 0.001″ resolution, and 100 division scale, then the pointer needs rotate 10 times to reach its maximum travel range. And importantly, this amount of rotation, 10 revolutions, is recorded by the inner scale.
This range is an upside of using a dial indicator. A longer-range means you can easily perform a comparative measurement.
In comparison, the test indicators have a lower travel range. Although the pointers can rotate more than 2 revolutions, the scale is only able to record one revolution. Even though when the inner dial presents, it is only able to record with a maximum number of two pointer revolutions only.
Therefore, we use it generally for consistency measurement. This measurement doesn’t really require a longer range such as what the dial indicator has, 1″ range. The measuring range of the test indicator is typically 0-0.03″ but you could also easily find them have maximum range of 0.06″.
6. Resolution and Accuracy
Dial indicators have a lower resolution than the test indicator. Normally, the range can be from 0.001″ to 0.0005″. But people seemingly tend to use the 0.001″ resolution. Since the accuracy is usually equal to the resolution value, therefore the accuracy is also lower than the test indicator. Currently, on the market, you can find them with 0.0001″ resolution as well such as Mitutoyo 2358S-10.
Test indicator has slightly a higher resolution and accuracy. As we observe on the market these days, the resolution range is from 0.001″ to 0.0001″. But people seem to use the 0.0005″ resolution models frequently. You can check on several places such as forums. Most measuring tools have an accuracy value equal to the resolution, thus the test indicator accuracy is slightly better than the dial indicators.
7. Measurement Type
When it comes to measuring, the dial indicator excels in repetitive and comparative measurements. While the test indicator excels in a consistency measurement.
8. Size and Structure
In terms of size, dial Indicators are normally larger. According to their structure, dial indicators are heavier than the test indicator. Let’s see an example of a Mitutoyo company product. We took the Mitutoyo dial indicator series 2 to observe the general structure and size of it. This model is around 113 mm of height and 38 mm of width.
Test indicators are normally smaller in size. They are not as heavy as dial indicators. Let’s see an example of Mitutoyo company products. We took a Mitutoyo test indicator series 513 to observe the general structure and size of it. This test indicator is around 90 mm of the length and 13mm of the height.
9. Visibility
Dial indicators have a larger dial face diameter than the test indicator. Due to its bigger size, this indicator is more clearly visible than the test indicator.
Test indicators have a comparatively smaller dial face diameter due to their smaller dimension. So, the visibility is not as good as the dial indicator.
10. Amount of Scale
Dial indicator has an outer and an inner scale. That means there are at least two scales. While the test indicator can vary. Some have 1 scale only, while the others can provide two dial scales. The two dial scales are those that possess a measuring range equal to its two pointer revolutions.
11. Way to Mount
Dial indicator has an ear plug at the back body where the stand can be mounted. The most highlighted thing about this earplug is its hole. When buying a dial indicator, you need to consider the diameter of that hole whether it suits your (magnetic) base or not. This earplug is commonly screwed. You can remove it when needed.
Some models come with a magnetic back. The dial indicator can stick into the magnetic part of your lathe or mill instead of using the stand. The stem is another part of the dial indicator where the stand can mount onto.
In contrast, the test indicator has no hole. It only stems where the stand can be mounted to. Some indicators only provide dovetail rails where the stems stick onto, and then the stem mounts to the stand.
Dial Indicator & Test Indicator: Similarities
Dial indicators and test indicators have few similarities in them. The following listed points are the similarities that can be found in both of them.
- They magnify a small distance into a sufficient distance which is easy to read by eyes.
- Having bearings.
- Both the dial Indicator and the test indicator can be used in measuring geometrical tolerance.
- They can be used in different tolerance factors such as run-out, total run-out, cylindricity, perpendicularity, flatness, roundness, straightness, etc.
- Both of the products can be delivered with a strong base stand.
Conclusion
Overall, we hope that you could easily learn the differences between dial indicator vs test indicator through this page. If you think the explanation is too long, you may want to see the simpler explanation through the following list.
Dial Indicator:
- Plunger contact type
- Repetitive and comparative
- Vertical contact point position to the surface
- Longer travel range (several revolutions) typically 1″
- Lower resolution 0.001″ (typical resolution)
- Able to measure the depth.
Test Indicator:
- Lever
- Excels for consistency measurements
- Horizontal contact point position to the surface
- Shorter travel range (1 or 2 revolutions) typically 0.03″
- Higher-resolution but short measurement range 0.0005″
- Not able to measure the depth.
Other posts under the category “Dial Indicator”:
- What is Dial Indicator? – These are the Measurements that Dial Indicator Handles
- Dial Indicator Body Parts: Internal and External Parts
- Types of Dial Indicator: According to These 3 Factors
- Dial Indicator Vs. Test Indicator: the Plunger and the Lever Models
- How to Use Dial Indicator
- What is Cosine Error? – How Far Its Impact on the Measurement Accuracy of A Dial Indicator
- How to Read Dial Indicator: Reading the .001″ and .0005″ Resolution
- Dial Indicator Calibration: How to Calibrate the Dial Indicator
- Best Dial Indicator Reviews: Top 10 Products
- Best Test Indicator Reviews: Top 10 Products
- Best Dial Bore Gauge Reviews
- Best Digital Indicator Reviews
