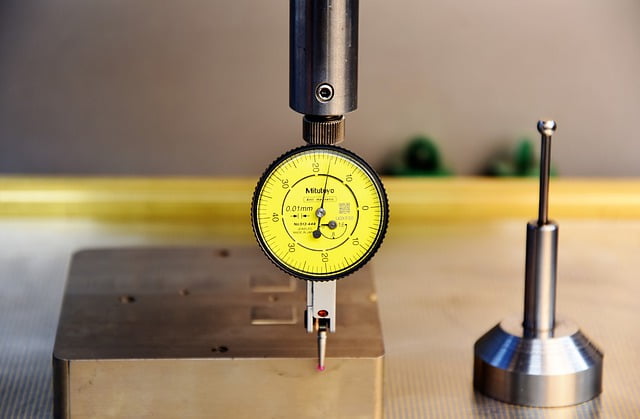
When buying a dial indicator, it’s vital to know some types of dial indicators. One of the advantages of recognizing them is to prevent picking one that is not suitable for you.
If you are new in this case, this post should be one of your priorities to read first.
Before you read further, make sure you are familiar with some basic dial indicator body parts. They are important as this article will be talking a lot about them.
The 3 Things Differentiating Dial Indicator
There are three basic things that differentiate them:
- The contact point probe (how the contact point moves)
- Inner dial scale (numerical markings and pointer direction)
- The working mechanism (mechanical or electronic)
1. Dial Indicators Type Based on the Probe
Probe means how the contact point connected to the body.
Plunger-Type Dial Indicator
The plunger-type dial indicator has a probe called a plunger that connects the contact point to the stem. This plunger moves out and in. This type of dial indicator has a stem rod perpendicular to the object surface. This type cannot be used at any other angle except at the 90° angle.
Usually, people call the plunger-type dial indicator just a dial indicator.
Lever-Type Dial Indicator

This type of dial indicator has a probe called a lever that is able to swing up and down. The lever connect the contact point to the pivot. This lever must be applied at a 0° angle to measure, while the body can be bent as the operator wants.
Usually, people call this lever-type dial indicator a dial test indicator (DTI) or just a test indicator.
2. Dial Indicators Based on the Marking
Further, the dial indicator and the test indicator can be divided based on their outer scale numerical marking increment.
The outer scale is the larger circular scale of an indicator. It has a long pointer in which its edge goes around the scale floating over the numerical markings. These markings are presented differently.
Continuous Reading Dial Indicator
Some indicators have numerical marking increments starting from “0” all the way up to the highest number in which the highest number is replaced with “0” marking.
For example, 0 – 5 – 10 – 15 – 20 – 35 – 40 – 45 – 0.
Product examples
Plunger-type dial indicators with continuous reading:
- Starrett 81-211J
- Fowler 52-520-109
Lever-type test indicators with continuous reading:
- Brown & Sharpe TESA 212L
Balanced Reading Dial indicator
It has two increment directions. One starts from the “0” mark to the right, while another one starts from the same “0” mark to the left. Both of these two increments will meet up in the lower part of the scale and interprets the highest number. You can find also in some models that the increments don’t meet.
For example, 0 – 10 – 20 – 30 – 40 – 50 – 40 – 30 – 20 – 10 – 0.
These markings have an increment of 10 that starts from 0 to 50 and a reduction of 10 that starts from 50 to 0.
In another view, a balanced marking dial indicator contains both increment and reduction markings put together on the scale.
Product examples
Plunger-type dial indicators with balanced reading:
- Mahr Federal 12I AGD 1 (0.0001″ resolution)
Lever-type test indicators with balanced reading:
- Mitutoyo 513-504T
- TESA Brown & Sharpe Interapid 312b-1
3. Dial Indicator Type Based on the Mechanism
There are other types of a dial indicator, their mechanism is different from each other. With the flow of technological advancement, There are 2 kinds of dial indicators that came to the market. They are:
Mechanical Dial Indicator
This type of dial indicator is fully built with a mechanical pointer and gears mechanism.
Digital Dial Indicator
This type of dial indicator has a digital LED display and is fully powered by a battery. This type of dial indicator is very convenient to save consecutive results.
Summary
Those are the common basic types of dial indicators that you could find on the market these days. The easiest way to differentiate them is by observing their inner dial face, contact point, and working mechanism. You can observe their structures by searching for the product example mentioned in the explanation.
We hope this article can help and make it easy to understand the types of dial indicators.
Other posts under the category “Dial Indicator”:
- What is Dial Indicator? – These are the Measurements that Dial Indicator Handles
- Dial Indicator Body Parts: Internal and External Parts
- Types of Dial Indicator: According to These 3 Factors
- Dial Indicator Vs. Test Indicator: the Plunger and the Lever Models
- How to Use Dial Indicator
- What is Cosine Error? – How Far Its Impact on the Measurement Accuracy of A Dial Indicator
- How to Read Dial Indicator: Reading the .001″ and .0005″ Resolution
- Dial Indicator Calibration: How to Calibrate the Dial Indicator
- Best Dial Indicator Reviews: Top 10 Products
- Best Test Indicator Reviews: Top 10 Products
- Best Dial Bore Gauge Reviews
- Best Digital Indicator Reviews

